There are two ways to learn anything – either from someone else’s experience or from your own. I’m used to doing it this way because it gives the best results – you already get the skills you’ll use. This is especially true for photography.
 Tools
Tools

This time I had:
– tractor glass (well…you know, I work part-time as a tractor driver outside the blog);
– a garland that runs on 3 AA batteries (bought second-hand – this is important);
– a white garland that runs on a USB cable (bought in China, shines “in Chinese style”);
– a giant bear, honestly stolen from my wife’s pendant;
– a desire to get “bokeh like that in the photo”.
Experiment
 Usually, good bokeh requires either a lot of luck (for the stars to coincide and the sunlight to refract correctly in the drops or something else). But this is not often possible, so photographers use artificial splashes, which is what I wanted to use. Especially since I still have the glass from the tractor. And it seemed like a good idea to place the garland outside the glass so that the blurred drops would give the same “bokeh”. What did the design look like?
 The camera is mounted on a tripod, the bear is attached to a bottle cap (this is to give an idea of its size, plus it was convenient to use the bottle that way). Behind them is a stack of glass, which rests on a cheap tripod, and two more cheap tripods behind it hold two garlands.
 The first shot in the post was taken without glass, and when I did it, it became clear that glass would not help improve the result in any way. But…are we here to experiment?
 The camera in this case was a Panasonic S5 with a manual Tamron Adaptall 35-70/F3.5 Macro lens. It’s a fairly cheap lens that I really like.
 In order for the object to stand out from the background, I needed to illuminate it with something. And… I used a regular LED+18650 cell for this. Do you know a more budget option?))
 In this picture above, I specifically lit the LED to make it clear how the subject is illuminated. In this case, only the subject itself is illuminated.
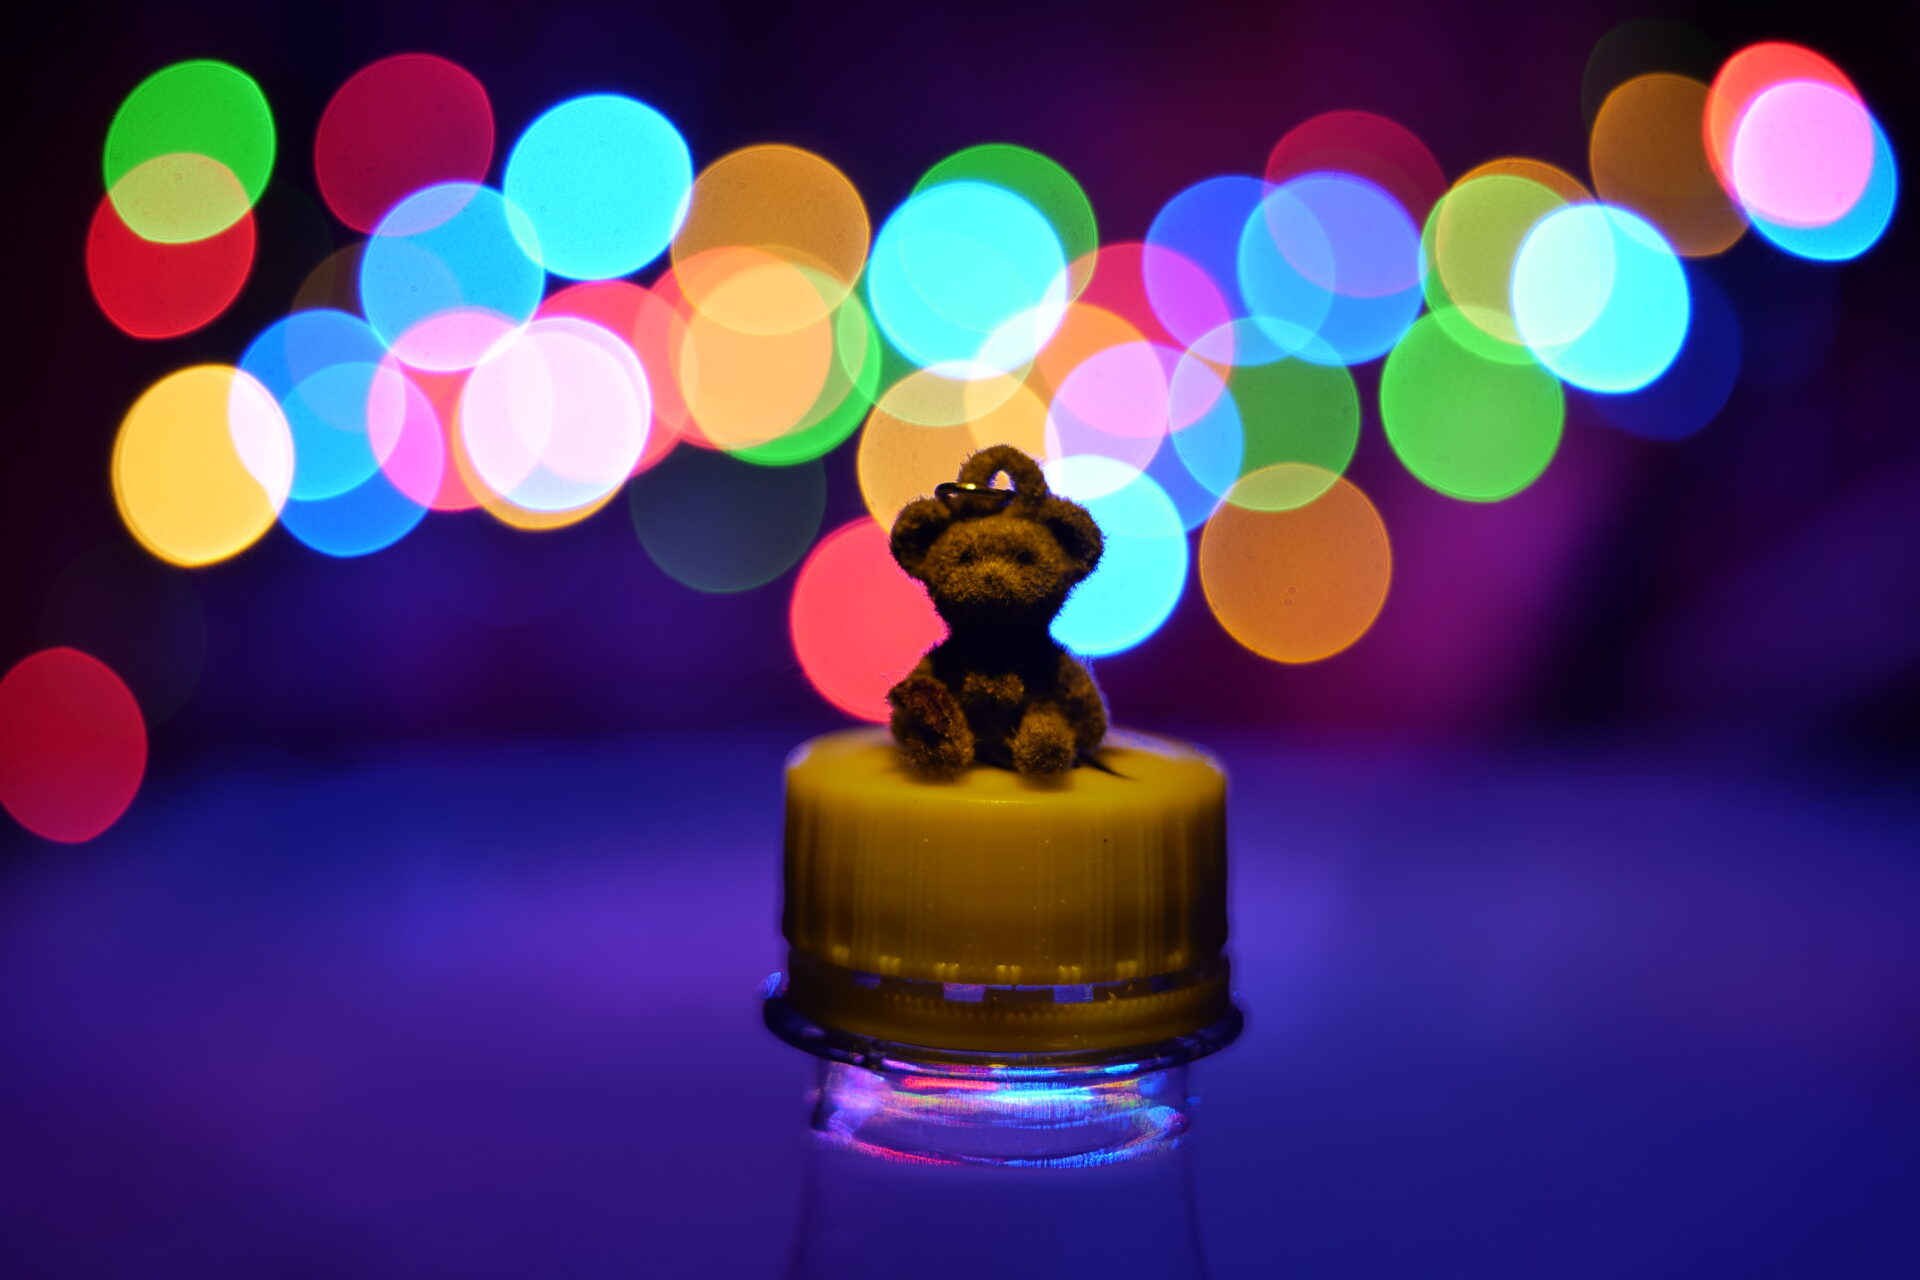
 As a result, we have a wonderful bear against the bright background bokeh. This particular shot was one of the first, so I haven’t adjusted the light much yet, but the result was already (in my opinion) quite good.
 If you want to take bokeh through wet glass, you’ll end up with something like the one in the picture above. Is it good? I don’t think so 🙂
 At the same time, colored balls are great to photograph simply through wet glass. It adds a certain charm to them, doesn’t it?
 This shot really reminds me of some “distant city lights”. I even had the idea to take this glass and…go and shoot street lights or lighting through them. I think, in the absence of a car, this would be a good option to get “something like” shooting through a car window.
Understanding the correct composition of the frame gives us the opportunity to take creative pictures and get exactly the result we wanted. And although for experienced photographers what I do is “..and so obvious” – I am discovering for myself the world of how to get something new that I have not yet used in my work. Who knows, maybe through these experiments I will find my style 🙂
Discover more from And..
Subscribe to get the latest posts sent to your email.